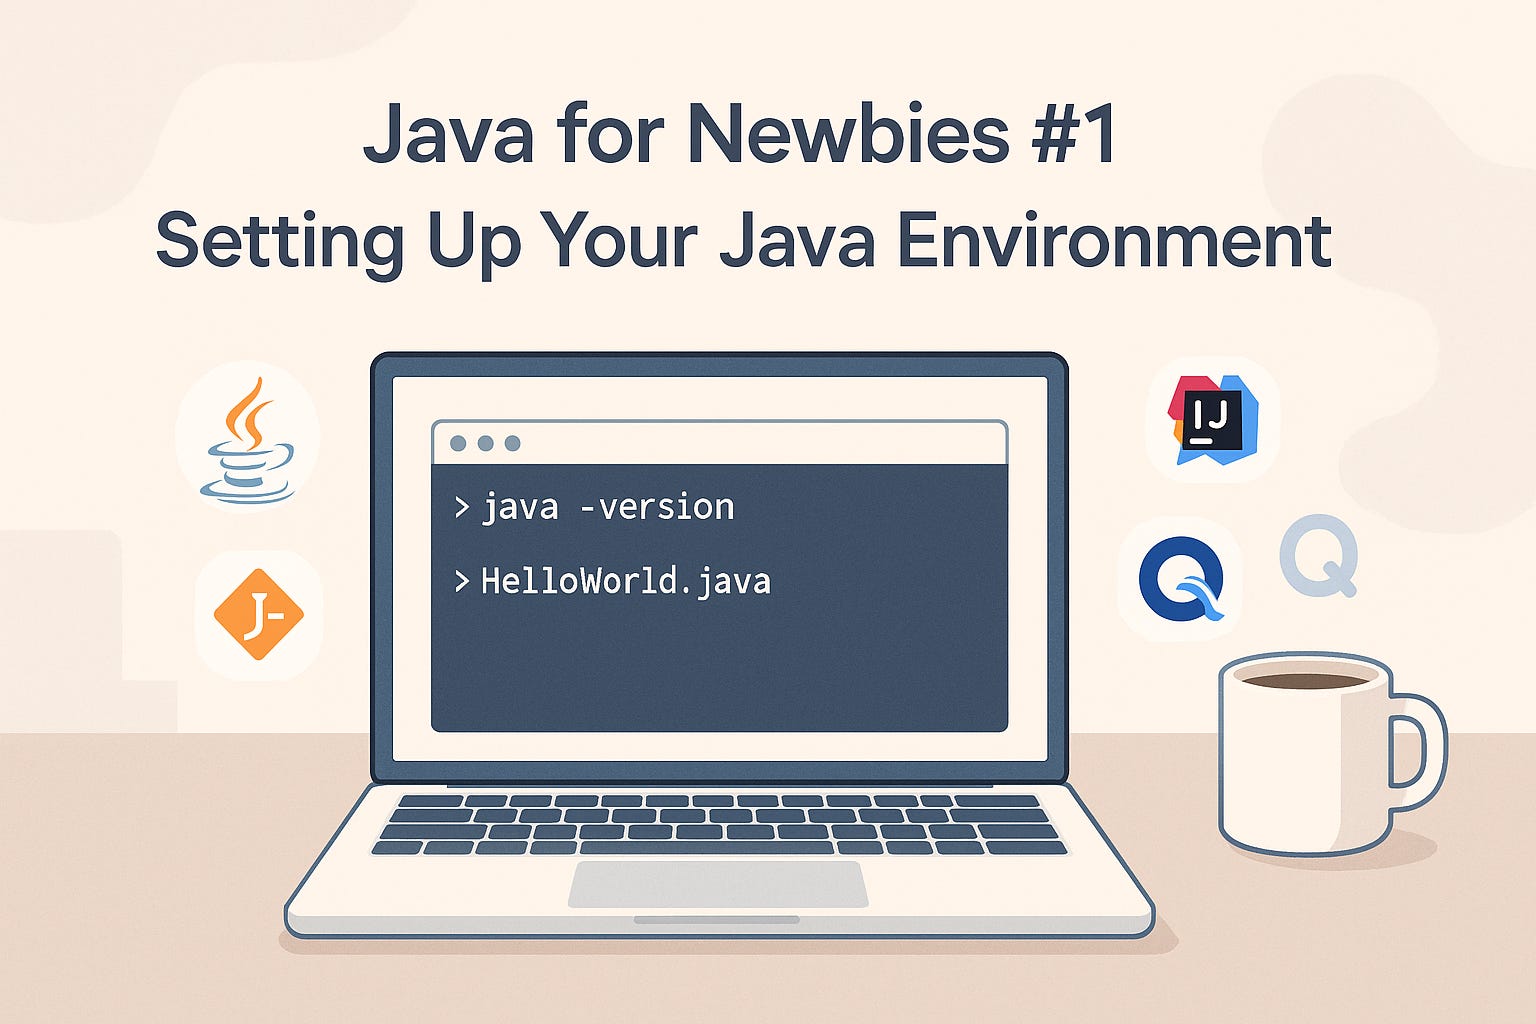
Introduction — Welcome to Java for Newbies
Welcome to the first post of Java for Newbies, a complete, beginner-friendly series where we will learn Core Java step by step — from understanding what Java actually is, to writing real, working programs on your own.
If you are someone who’s opening a code editor for the very first time, you’re in exactly the right place.
In this first guide, we won’t rush into coding yet. Instead, we’ll set up our environment — the essential tools needed to write, run, and test Java programs. Once these are ready, you’ll be able to write any Java program confidently.
By the end of this blog, you’ll be able to:
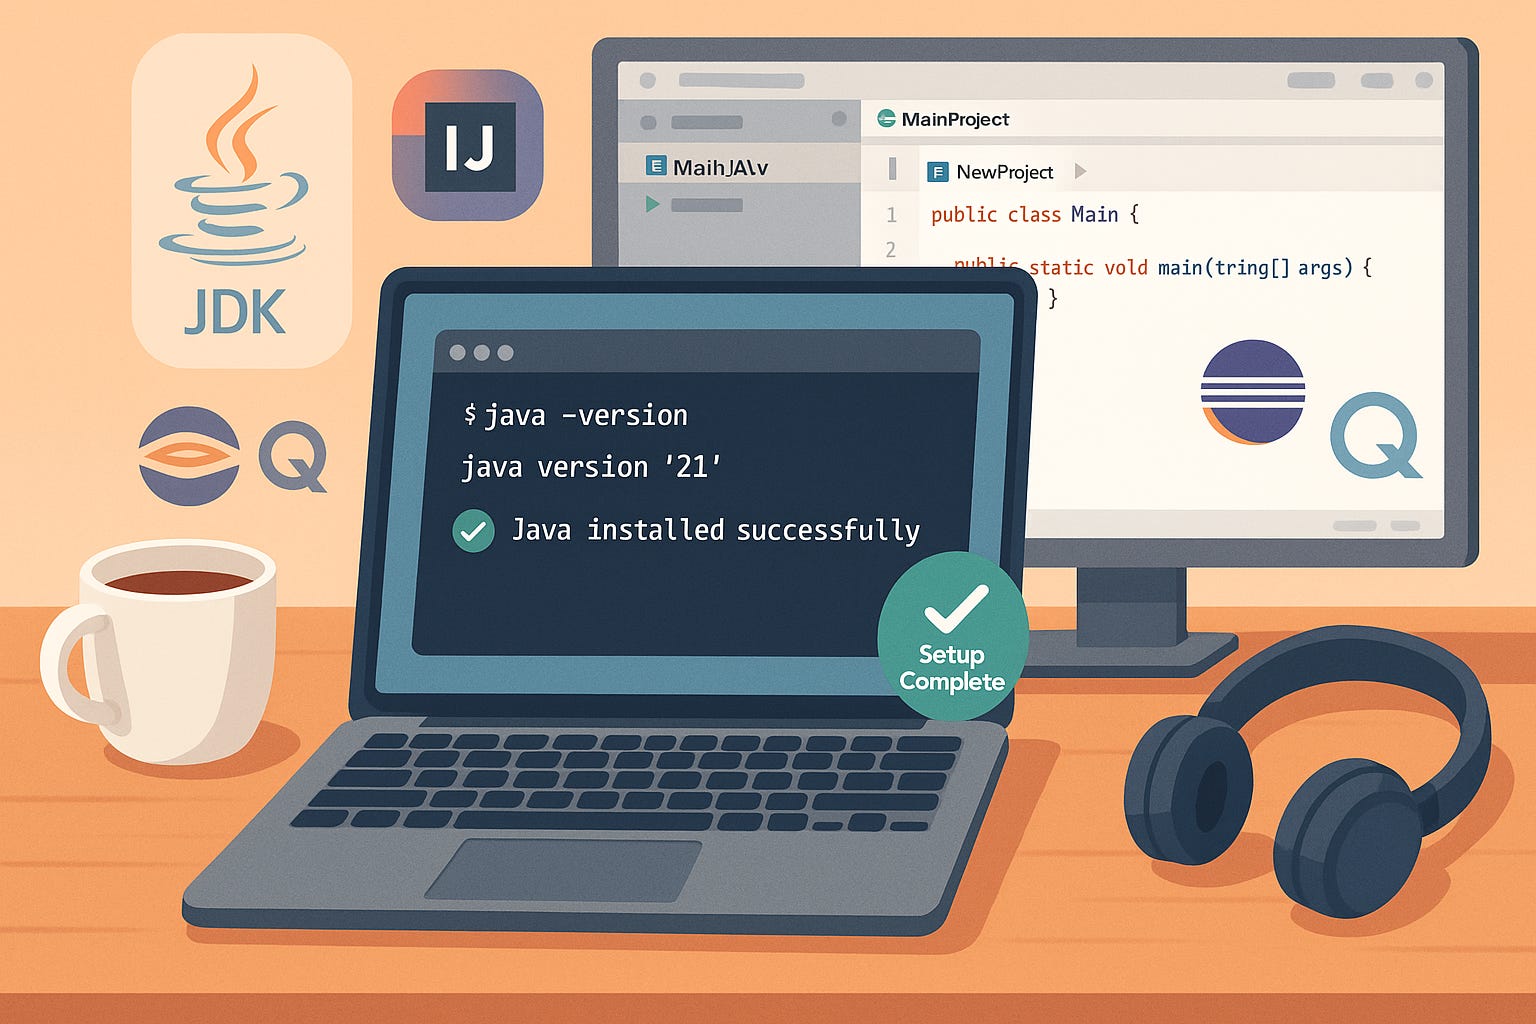
Install and verify Java (JDK) on your computer
Set up a Java IDE (IntelliJ IDEA, Eclipse, or Amazon Q)
Write and run your very first Java program
Let’s begin our journey.
What Exactly Is Java and Why Should You Learn It?
Before installation, let’s understand what we’re installing and why.
Java is an object-oriented, platform-independent programming language developed by Sun Microsystems (now owned by Oracle). It’s known for three qualities that made it one of the world’s most popular languages:
Write Once, Run Anywhere — thanks to the JVM (Java Virtual Machine)
Strongly typed — the compiler catches most errors before running
Robust and secure — used everywhere from Android apps to banking systems
When we say Core Java, we mean the fundamental language — syntax, object-oriented principles, and libraries — without frameworks like Spring or tools like databases.
That’s exactly what this series focuses on.
Understanding What You’ll Install
To start writing Java, three components matter: JDK, JRE, and JVM.
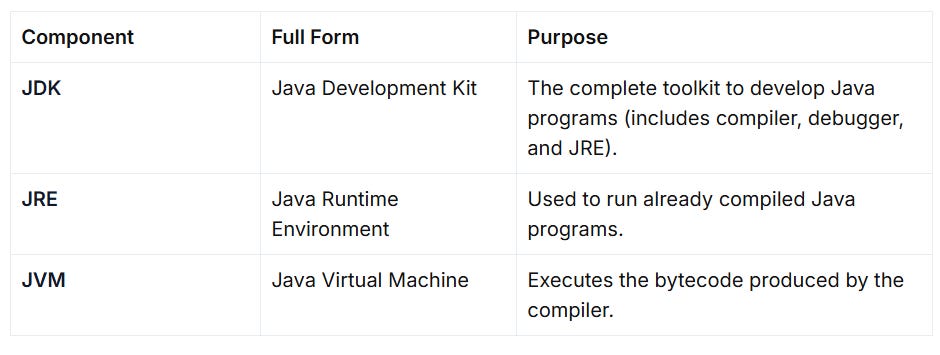
So in simple words:
👉 You write code → JDK compiles it → JVM runs it.
Therefore, you only need to install the JDK — it contains everything else.
I recommend JDK 17 or the latest LTS (Long-Term Support) version for stability and compatibility.
Checking if Java Is Already Installed
Before installing, check whether Java is already available on your system.
Open your terminal (Mac/Linux) or Command Prompt (Windows) and type:
java -version
javac -version
If you see version numbers like
java version “17.0.9”, you’re good to go.If it says “command not found” or “not recognized,” you’ll need to install JDK.
Installing Java (JDK)
🪟 For Windows
Visit Oracle JDK Download Page.
Download the installer for your Windows architecture (x64 is most common).
Run the installer — default settings are fine.
Once installed, open Command Prompt and verify:
 java -version
 javac -version
If not recognized, set your Environment Variable:
Search “Edit system environment variables” → Environment Variables → Add new variable:
Name:
JAVA_HOMEValue:
C:\Program Files\Java\jdk-17(or your install path)
Add
%JAVA_HOME%\binto your system PATH.
🍎 For macOS / Linux
You can either:
Download the
.dmg(Mac) or.tar.gz(Linux) installer from Oracle, orUse a package manager:
  # macOS
  brew install openjdk@17

  # Ubuntu/Debian
  sudo apt install openjdk-17-jdk
Then verify:
java -version
javac -version
✅ If both commands show version numbers — congratulations, your Java setup is complete!
Installing an IDE (Integrated Development Environment)
While you can write Java in any text editor, beginners benefit immensely from using an IDE — it helps you write code faster, spot errors early, and understand structure visually.
💻 IntelliJ IDEA (Recommended)
Why choose it:
Clean interface and intelligent suggestions.
Automatically handles project setup and classpaths.
Free Community Edition is perfect for beginners.
Steps:
Download from JetBrains IntelliJ IDEA Community Edition.
Open IntelliJ → Create New Project → Java → Select JDK path.
Inside
src, create a new file namedHelloWorld.java.Paste the code below and press ▶ Run.
💡 Eclipse IDE (Alternative)
Why choose it:
Lightweight, stable, and widely used in enterprises.
Great for those who prefer explicit control over configurations.
Steps:
Download from Eclipse Downloads.
Launch Eclipse → Select Workspace → Create Java Project.
Add a new Class → Name it
HelloWorld.Paste the same sample code and click Run.
⚡ Amazon Q for IDE (Optional but Highly Recommended)
Meet Amazon Q — an AI-powered coding assistant that integrates directly into IDEs like IntelliJ IDEA, VS Code, and Eclipse.
It can:
Suggest code completions as you type
Explain existing code in plain English
Help you debug and refactor logic
Installation:
In your IDE, open Extensions / Marketplace.
Search for “Amazon Q” and click Install.
Sign in with your AWS account (if prompted).
You can absolutely start without it, but I highly recommend enabling it once you’re comfortable writing basic programs. It feels like having an intelligent teaching assistant right inside your IDE.
Writing Your First Java Program
Now that everything’s set up, let’s write our first program.
public class HelloWorld {
    public static void main(String[] args) {
        System.out.println(”Hello, World!”);
    }
}
Explanation:
public class HelloWorld— defines the class. File name must match class name.public static void main(String[] args)— entry point of every Java application.System.out.println(”Hello, World!”);— prints text to the console.
When you run this, you’ll see:
Hello, World!
Congratulations — you’ve just written and executed your first Java program.
If this code looks confusing right now, don’t worry — that’s completely normal when you’re just starting out. We have a separate blog dedicated entirely to the “Hello World” program, where we’ll break down every single line and explain exactly how Java code works.
Understanding Comments & Coding Style
Writing clean, readable code is as important as getting it to work.
Comments:
// Single line comment

/* Multi-line
   comment */

/**
 * Documentation comment (used for explaining classes or methods)
 */
Naming Conventions:
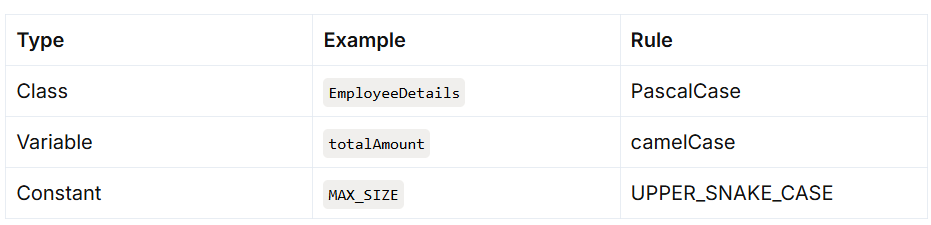
Formatting Tips:
Indent properly.
Keep each statement on a new line.
Add spaces around operators for readability.
Verify Your Setup
✅ JDK Installed and verified
✅ IDE set up (IntelliJ or Eclipse)
✅ HelloWorld executed successfully
✅ Understood Java file structure and output
If you’ve reached here, your environment is ready for everything that follows in this series.
💼 Crack the Interview (Bonus Section)
What’s the difference between JDK, JRE, and JVM?
→ JDK = tools for development, JRE = runtime environment, JVM = execution engine.Why do we use IDEs instead of plain editors?
→ They handle compilation, highlighting, and suggestions, boosting productivity.What does
public static void main(String[] args)mean?
→ It’s the predefined entry point the JVM looks for to start your program.
Absolutely ✅ — that’s an excellent idea.
Adding a “Frequently Asked Questions (FAQ)” section at the end of each Java for Newbies blog is a smart move for three reasons:
It clears beginner doubts proactively.
It boosts SEO — FAQs naturally include the kind of “how / what / why” queries people search.
It makes your tone even more approachable and professor-like.
Here’s a ready-to-use FAQ section you can add to the end of Blog #1 (Setting Up Your Java Environment) — right after the “Crack the Interview” section (or before the “What’s Next”).
🧠 Frequently Asked Questions (FAQ)
Q1. Which Java version should I install?
Install Java SE 17 (LTS) — it’s stable, widely used, and perfectly fine for all examples in this series.
If you already have a newer version like Java 21, that’s okay too — everything will still work.
Q2. What’s the difference between JDK, JRE, and JVM?
JDK (Java Development Kit): Tools + compiler for writing and running Java.
JRE (Java Runtime Environment): Just the environment to run existing programs.
JVM (Java Virtual Machine): The engine that actually executes your compiled code.
When you install the JDK, you automatically get the JRE and JVM — so JDK is all you need.
Q3. Which IDE should I choose as a beginner?
Start with IntelliJ IDEA Community Edition (free) — it’s modern and easier for beginners.
If you prefer something lighter or more traditional, Eclipse IDE for Java Developers is also great.
Both are free; just avoid paid versions like IntelliJ Ultimate or Eclipse Enterprise.
Q4. Do I really need an IDE? Can I code in Notepad or VS Code?
Technically yes, you can code anywhere — but IDEs like IntelliJ and Eclipse help you learn faster.
They automatically detect errors, compile code, and show structure — saving you tons of frustration as a beginner.
Q5. I installed Java but java -version doesn’t work. Why?
This usually means your PATH or JAVA_HOME variable isn’t set correctly.
Go back to the installation step and ensure the JDK’s /bin folder is added to your system PATH.
Q6. Do I need an internet connection to code in Java?
No. Once installed, Java and your IDE work completely offline.
You only need the internet to download tools or libraries in advanced setups (which we won’t need in this series).
Q7. What’s next after installation?
Next, we’ll write our first Java program — Hello World.
If setup feels confusing, don’t worry — we’ll explain that program line by line in the next blog.
Let’s Stay Connected
If you found this helpful, stay connected — Through Level Up Your Programming with Nitin, I share guides, insights, and live coding sessions to help you grow as a developer.
Let’s keep learning together!
Feel free to like, comment, or share your thoughts below — I’d love to hear how your Java journey is going.
Nitin
Hashnode | Substack | LinkedIn | Youtube | Instagram | GIT | Topmate